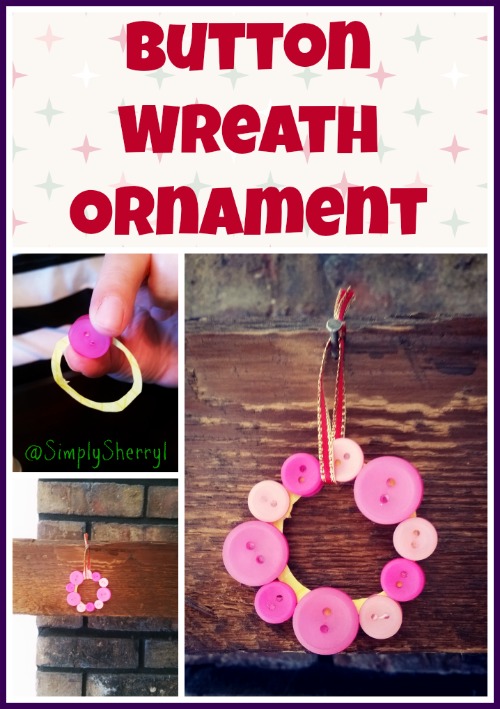
Button Wreath Ornament
 We love to make crafts in my house, and decorating for Christmas is no different! In fact, those crafts are the ones I treasure the most because they come with their own memories of when we made them together. I have ornaments and decorations that are over 30 years old that my kids have made, and I love unpacking them. This super easy Button Wreath Ornament is no exception!
Plus you can make it as large or small as you want it and in any colors that fit your tree or theme.
Here’s how we made our button wreath ornament:
Materials:
- Buttons (assorted sizes and colors)
- Paper (construction, cardboard, scrapbook, etc)
- Glue
- Ribbon
Instructions:
- Begin by arranging your buttons in a circle pattern, over the paper you’re going to use as the ring. Note: the size of the circle, colors of the buttons, pattern, etc is completely your choice!
- Once you have your pattern laid out, pull out the same buttons (or another pattern of your choice) for the back and set aside.
- Trace around the outer edge of the wreath with a pencil, then remove the buttons from the paper.
- Cut along the inside of the circle you marked; poke a hole in the center and cut another smaller circle, leaving a thin strip to glue the buttons onto.
- Begin gluing your buttons together, sandwiching the thin paper circle in the center of the buttons.
- Allow ornament to dry completely.
- Add a loop of ribbon, or tie into a bow, for easy hanging on your tree.
Helpful Tips:
- Mix up the buttons in both colors and sizes for a fun, modern look.
- Going for formal tree decorations? Buy metallic buttons all in the same size!
- If young children are making these ornaments, you can leave the paper circles larger for easy handling or have them only glue on one side.
- Don’t feel limited by a circle; use a triangle paper guide for a tree look or a square for a gift shape!
Leave a Reply