DIY Vintage Vanity Chair Makeover

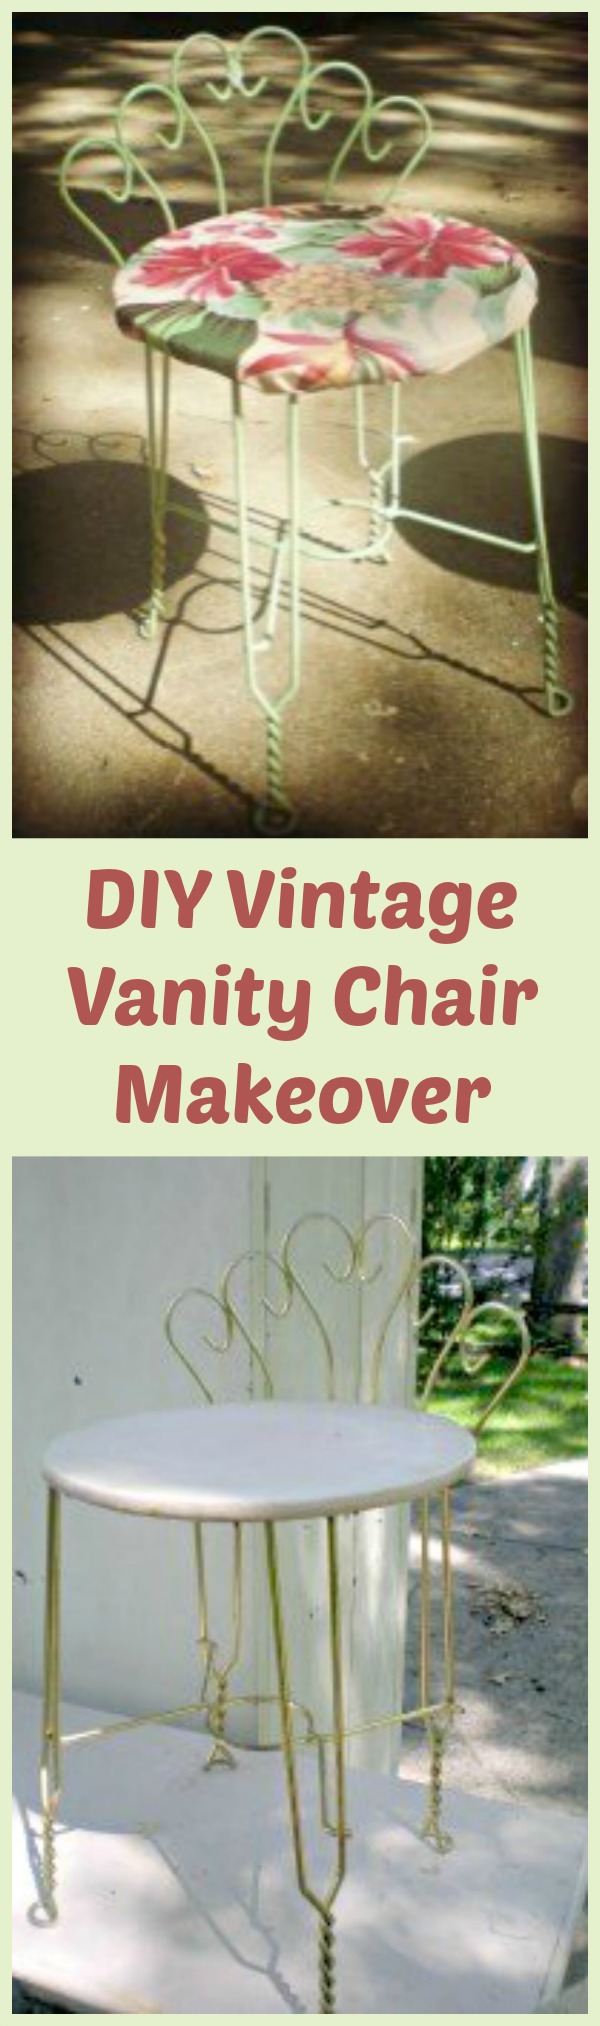
There is nothing else as rewarding as turning someone else’s trash into your very own treasure. Perhaps you have been at a garage sale or flea market this summer and ran into a cute piece of furniture that has seen better days. Maybe the fabric is tattered or it is in need of a good scrubbing and paint. Whatever the case may be, perhaps you passed it on by afraid it would be too much work to spruce up. But the truth is, making over small furniture pieces can be quite simple and very rewarding! For example, take a peek at this easy vintage vanity chair makeover we just completed last weekend. It only took an hour to fix up and we spent less than $10.00 on the total project. Now that is turning trash into treasure! If you have always wanted to rescue a small furniture piece, perhaps a chair like this one, take a look below at how easy it is to give it a fresh new look.
DIY: Vintage Vanity Chair Makeover

First, let’s take a look at the supplies you will need. Most of these items can be found at your local craft store and thrift stores.
Supplies Needed:
*1 Old Chair. Look for something that is still solid and intact. Cosmetic flaws don’t matter as you can fix or cover them. For this project, we found this vanity chair at a yard sale for $2.00.
* Spray or roll on paint. Metal is easier to spray paint and wood is easier to cover when using a roller. For our project I used one can of mint green spray paint which was $3.99.
* 1 Yard of Fabric. Duck cloth seems to be quite durable on chairs, but the choice is yours. For the project here I used about ½ yard of duck cloth floral fabric. But have a yard on hand just to be safe. My cost for this fabric was around $1.99 on sale.
* Staple gun and staples
* Scissors
* Screwdriver
* Old sheet or drop cloth

Directions:
1. First, prep your piece by cleaning it well with a damp cloth. You can also lightly sand the piece if you need to or use carpet cleaner to remove any upholstery smells.
2. Take your screwdriver and remove the four screws under the seat cushion. Set your cushion and screws aside.
3. Place your piece on a drop cloth or old sheet and start painting. Apply two coats, allowing each coat to dry well.
4. Place your cushion face down on the fabric of your choice. Pulling tightly, gather the fabric around the cushion and begin wrapping as you would a present. Be sure you continue to use a firm grip so you cushion is smooth.
5. Start stapling your fabric to the underside of the seat cushion. Continue until all of the fabric is secure and in place how you want it. When you flip the cushion over the fabric should be tight and smooth.
6. Take your cushion and screw it back into the chair. Be sure your chair is totally dry before starting this step!
7. That’s it! You can now step back and be proud of your new piece!

See how easy it is to make an old piece like new? All you need is a few tools, a little paint, and a touch of fabric and you too can turn some trash into treasure. Before, this vanity chair was rusty, dingy, and very outdated. Now it is fresh, cheerful, and the perfect addition to our get ready room! The best part is we were able to do the whole project for less than $10.00, which is far below what we would have paid if we purchased this at a boutique or antique shop.
So the next time you run into a sad little furniture piece that needs some love, don’t be intimidated. You too can make it over just like we did this vintage vanity chair! Good luck!
Like this post? Make sure to like and share this post with your friends using the share buttons because you know they would love these DIY posts as well!
Love it! It turned out so cute
The chair looks great, not sure I could do as good as you did 🙂
This is a neat idea. I would never have thought to do this. I would have either given the chair away or thrown it away.
I absolutely love this chair. It is so much fun to take something old and re-purpose it again. Beautiful!